We are going to explain a small initial setup that you will need to do once you have Proxmox installed. The configuration is done from a Proxmox Virtual Environment.
The default user is root, and the password was chosen during the installation.
Step 1. Open a Shell:
## Go to DataCenter and click on the pve node
## Look for Shell and open it

Paso 2. Install sudo:
$ apt update
Step 3. Change repositories: By default, Proxmox comes with Enterprise repositories, but we will change them to no-subscription repositories.
We will add the repositories in: /etc/apt/sources.list.d:
## Add Debian base repository (debian.sources):
| Types: deb deb-src URIs: http://deb.debian.org/debian/ Suites: trixie trixie-updates Components: main non-free-firmware Signed-By: /usr/share/keyrings/debian-archive-keyring.gpg Types: deb deb-src URIs: http://security.debian.org/debian-security/ Suites: trixie-security Components: main non-free-firmware Signed-By: /usr/share/keyrings/debian-archive-keyring.gpg |
## Add ceph repository (ceph.sources):
| Types: deb URIs: http://download.proxmox.com/debian/ceph-squid Suites: trixie Components: no-subscription Signed-By: /usr/share/keyrings/proxmox-archive-keyring.gpg |
Path 1: sudo nano /etc/apt/sources.listpve-enterprise.sources
Add the following line at the start of the file to prevent using proxmox enterprise repository:
Enabled: no
Step 4. Install Ceph (optional):
## Go to DataCenter and click on the pve node.
## Look for Ceph and click Install Ceph.

## In the Info window: Change the Ceph installation version to "squid (19.2)". Change the repository type to "No-Subscription".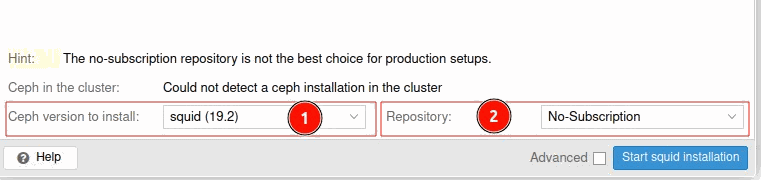
## Start the Squid installation
## When you reach the Configuration tab, set it up as you prefer.
Step 5. Go back to the Shell and update:
$ sudo apt update && sudo apt full-upgrade -y && sudo apt autoremove -y
$ reboot
Step 6. Configure the two Serial ATA Controllers:
## Go to DataCenter and look for Resource Mappings.
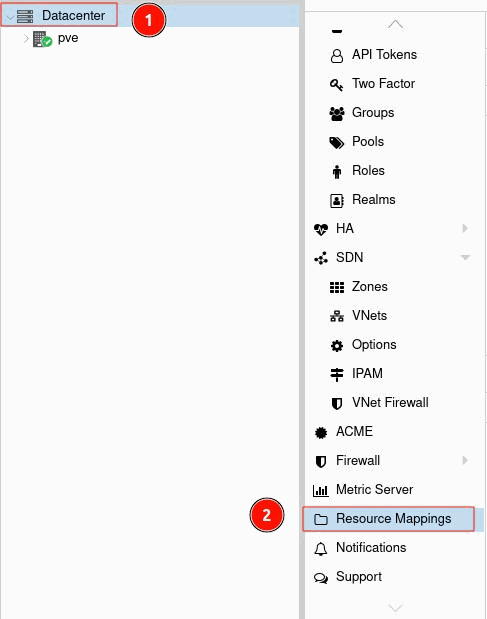
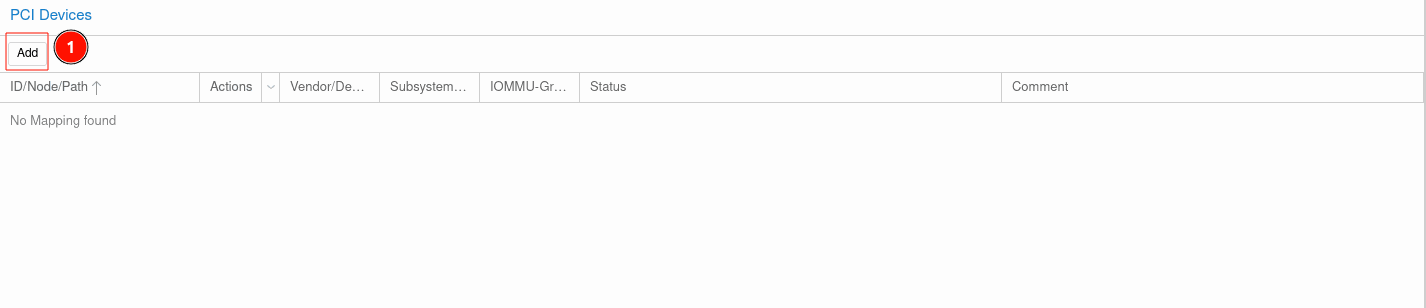
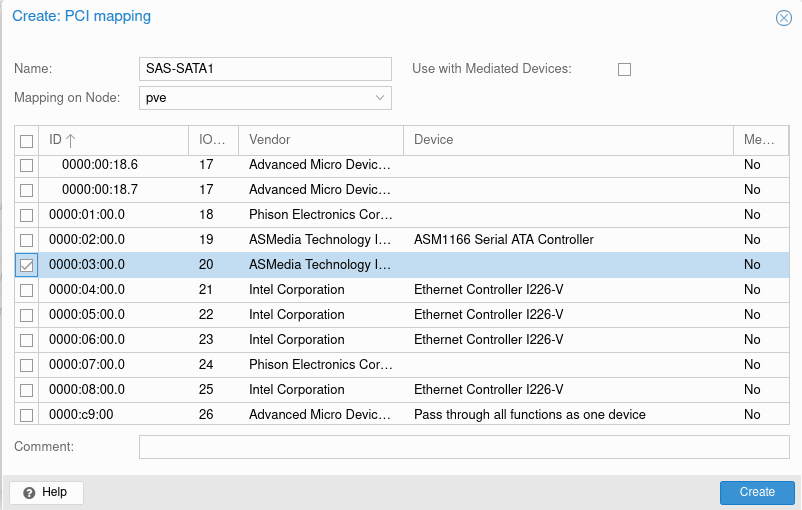
## Under PCI Devices, add two entries, one for each SAS
First entry: You can assign any name you like; we assigned SAS-SATA0. Look for the entry ASMedia Technology with ID: 0000:02:00.0 and click Create.
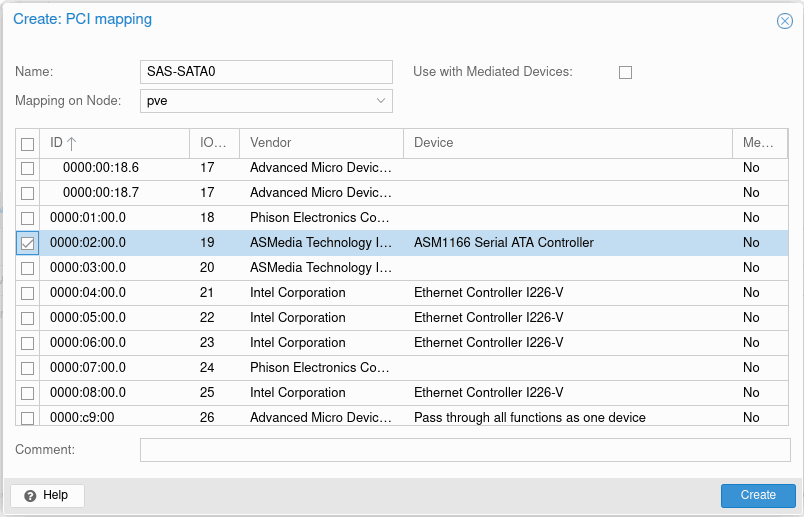
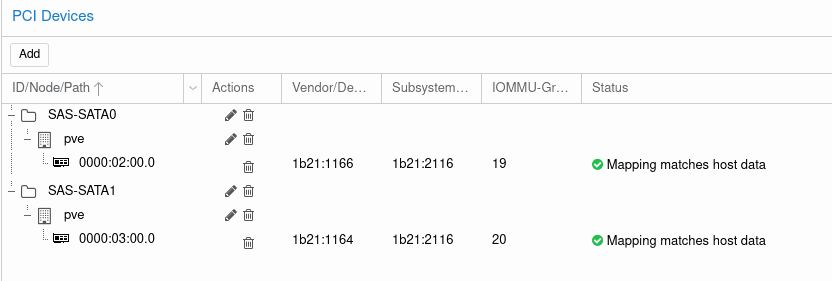
Second entry: You can assign any name you like; we assigned SAS-SATA1. Look for the entry ASMedia Technology with ID: 0000:03:00.0 and click Create.
## It should look something like this:
Step 7: Disks configuration
## Go to pve and search for Disks
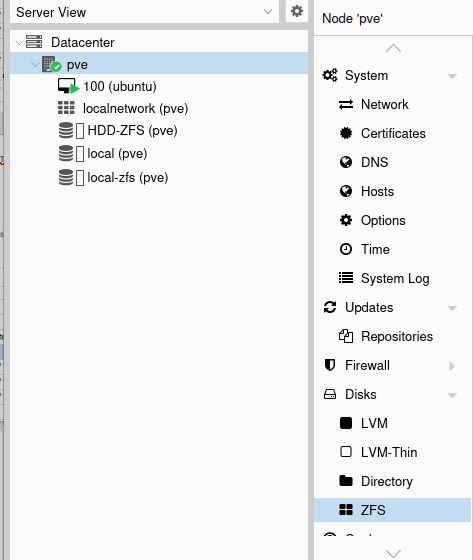
## Depending in your desired configuration, you are able to configurate the disks to use ZFS, LVM or directory. In our case we will use ZFS (our recommended option
## Go to ZFS and Create: ZFS
We will select the disks that we want to use for our ZFS, name the volume and select the RAIDZ level that you want to use and create the ZFS volume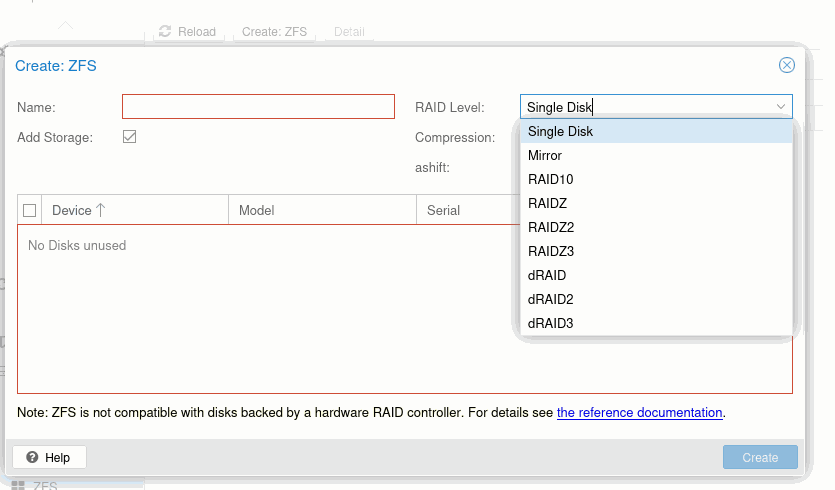
It will appear in ZFS volumes, afterwards we can use it on virtual machines
Step 8 (Optional): Graphics Card passthrough
If you want use a graphics card in your virtual machines, it is possible via passthrough of the graphics card:
If you use a NVIDIA graphics card 40 Series or prior, you will need to install the driver for the card with the package `nvidia-open-kernel-dkms` from the Debian repositories
If you use a NVIDIA graphics card 50 Series, you will need to install the driver directly from the NVIDIA repositories:
## Install the GPG key:
`$curl -fsSL https://developer.download.nvidia.com/compute/cuda/repos/debian13/x86_64/8793F200.pub | sudo gpg --dearmor -o /usr/share/keyrings/nvidia-drivers.gpg`
## In /etc/apt/sources.list.d/nvidia.sources:
| Types: deb URIs: https://developer.download.nvidia.com/compute/cuda/repos/debian13/x86_64/ Suites: / Components: Signed-By: /usr/share/keyrings/nvidia-drivers.gpg |
And update the repositories, afterwards you can install the drivers: `$sudo apt-get install nvidia-driver nvidia-kernel-open-dkms`
## Go to DataCenter and search for Resource Mappings
## Add a PCI mapping device, in our case the NVIDIA graphics card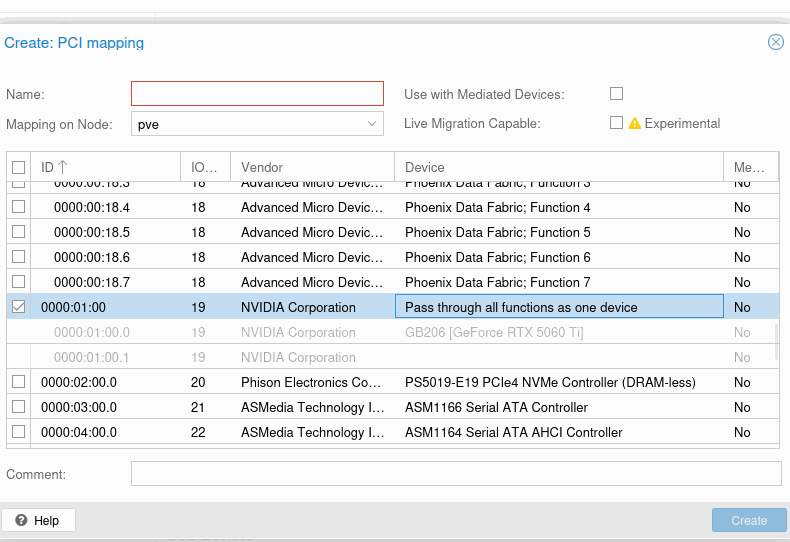
We will assign a name to it and create the mapping, afterwards you will be able to use it in the virtual machines
WARNING: if you want to use the graphics card in your virtual machines you need to NOT use the video output from the graphics card and dedicate it fully for your virtual machine
Step 9. These are some simple steps to allow you to continue with a more advanced system setup.