If you are going to do it from Windows XP, it is a requirement that you have this already installed, or that you install it for the occasion:
Microsoft .NET Framework v2 must be installed. You can download it here:
https://goo.gl/UbNwFC
Microsoft Image Mastering API v2 must be installed. You can download it here:
https://goo.gl/NGegpT
----------------------------------------------------------------------------------
1- Download the program from the following link.
http://wudt.codeplex.com/
2- Once downloaded we open it.
3- Click on next until the application is installed.
4- Open the application.
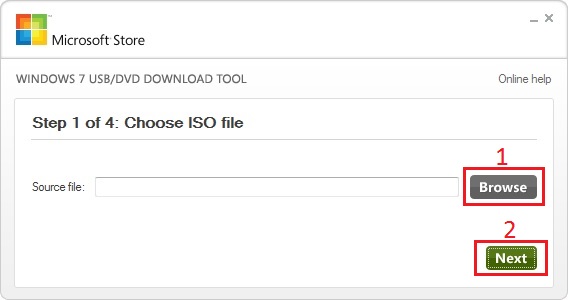
5- When executing the application a window will open where we will be asked to select an ISO file. We click on "browse" and navigate through the folders until we select our file. Once selected we click on the green button that says "Next".
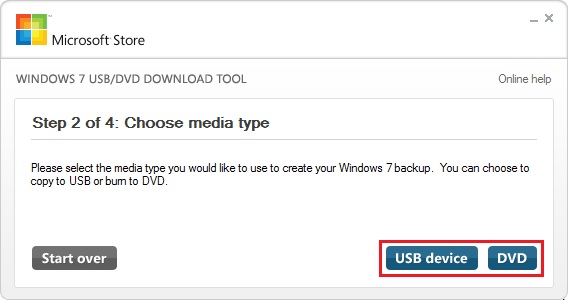
6- In the following step we have to select where we want to install the files for the installation, we will be able to choose between a USB or a DVD. When we choose our option, USB, we will skip the next step.
7- Now we will be able to choose in which of the USB devices we want it to be installed. We click on the drop-down menu and select the device. Once selected we proceed to click on the button "Begin copying" and immediately the program will begin to copy the data to our USB unit.
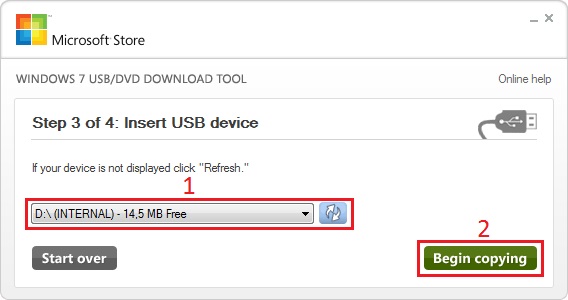
Caution: We must be sure which device we choose, however we can delete any other device and delete the data.
8- We will have to wait a few minutes until the operation is completed.
9- Once completed we can close the program and extract the USB safely.
10- Now we insert the USB in our computer and press F10 to boot from it. Now we can start the Windows installation!
